
Sep
Welcome to my day in the Back to School Blog Hop hosted by Sam of Hunter Design Studio!
I’m so excited to be sharing about one of my favorite tools! I love fusible applique and pre-assembling the applique shapes before fusing them down gives the opportunity to audition both the background and fabrics used in the appliques.
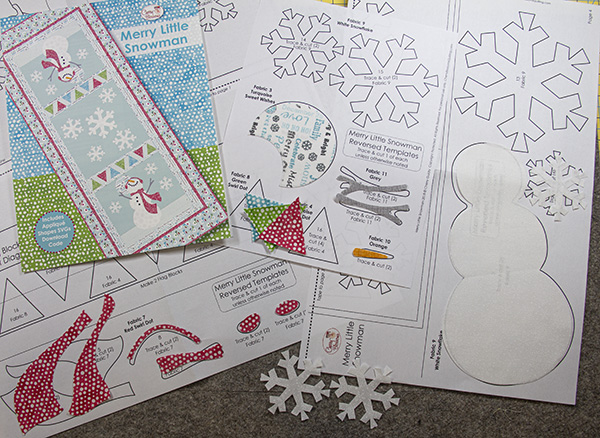
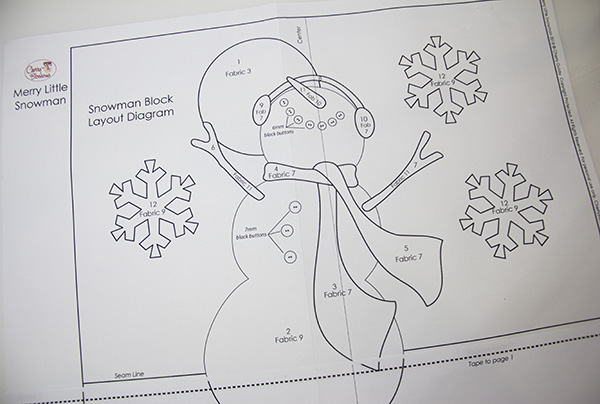
Let me show you how easy and fun it is! I’m using one of my latest patterns, Merry Little Snowman. I’ve already cut my applique shapes using the SVG files included in the pattern and my Silhouette Cameo, an electronic die cutter. Of course, you don’t have to use an electronic cutter! The pattern includes reversed templates to trace your shapes onto paper-lined fusible, fuse onto the wrong side of the applique fabric and then cut out.
The Applique Pressing sheet is one of my favorite non-stick heat-resistant sheets, but there are many others available; you can also use parchment paper.
Make sure you are working on your ironing station; I’m using the Mountain Mist Wool Pressing Mat.
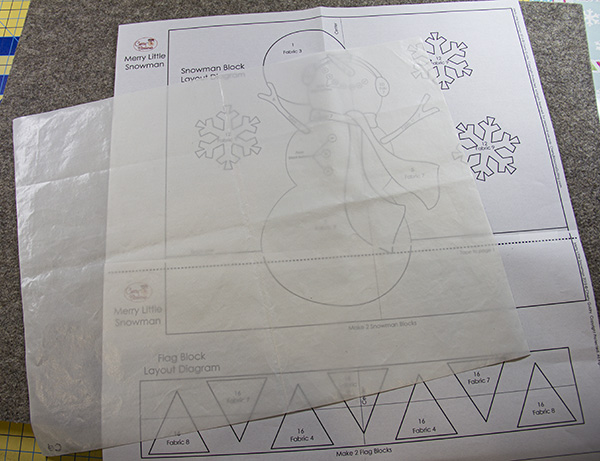
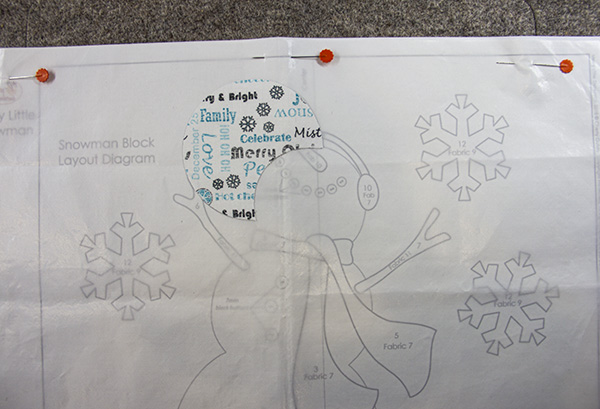
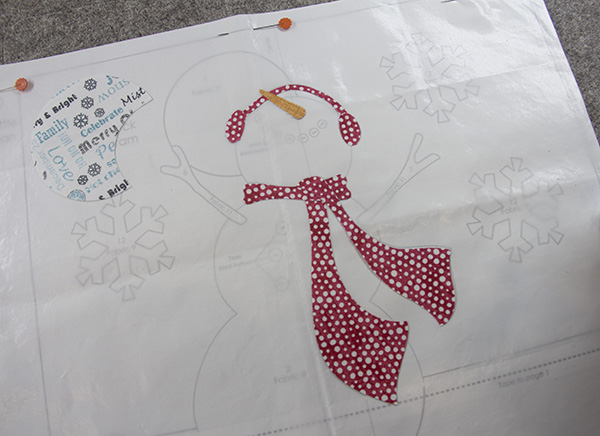
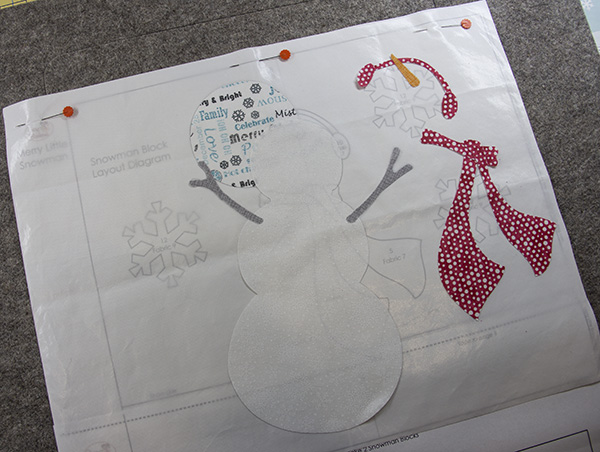
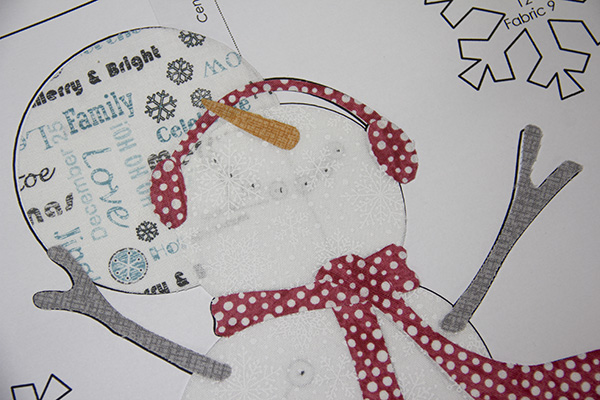
Start by placing the pressing sheet over the pattern’s layout diagram and pin together at the top; this works as a hinge to lift the pressing sheet if you are having trouble seeing through, even thought it’s rarely necessary.
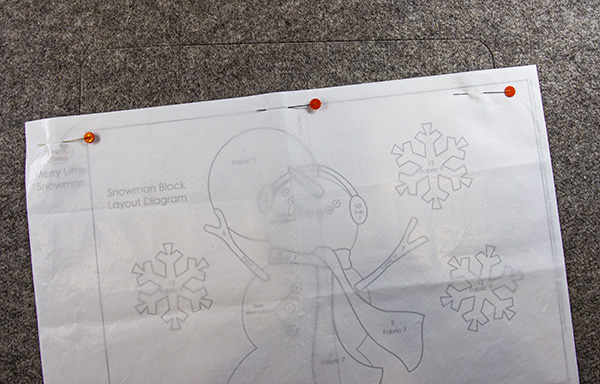
The shapes need to be assembled in sequence beginning with shape 1, but as you can see, shape one is blocking the view of some of the shapes!
So we’ll set shape 1 aside and pre-assemble the ear muffs…
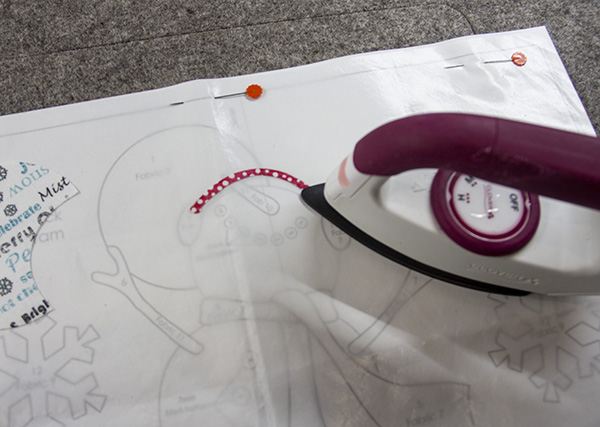
The goal is to fuse the shapes together.
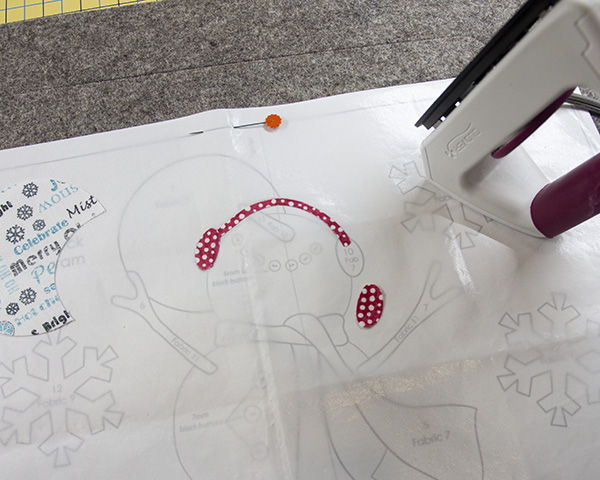
… add the carrot.
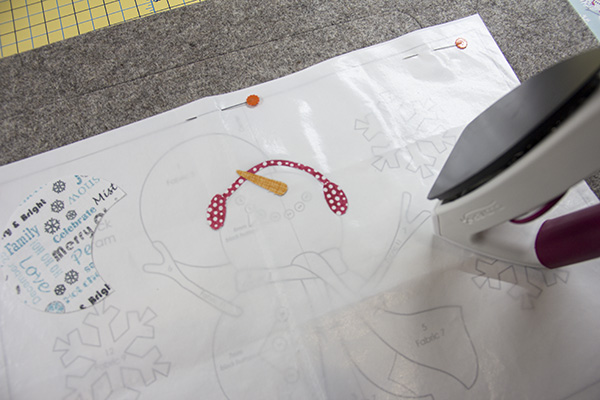
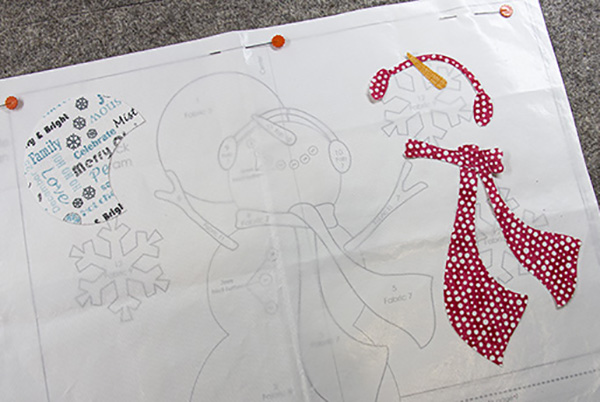
Now let’s pre-assemble the scarf…
Allow them to cool off, then peel the fused shapes off the pressing sheet and set aside.
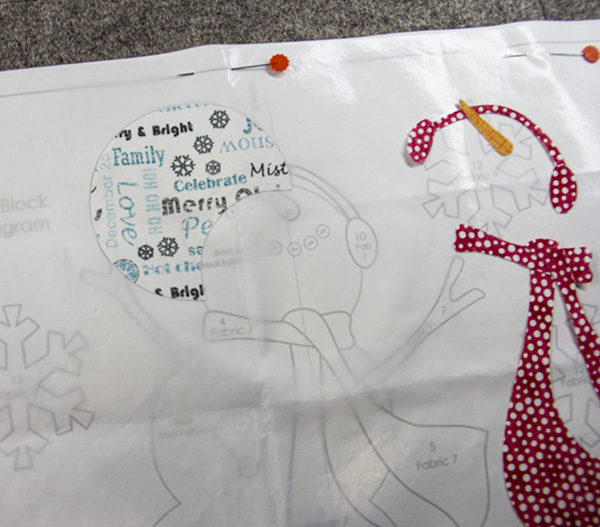
Now we can go back to shape 1 and fuse it in place…
Add the body…
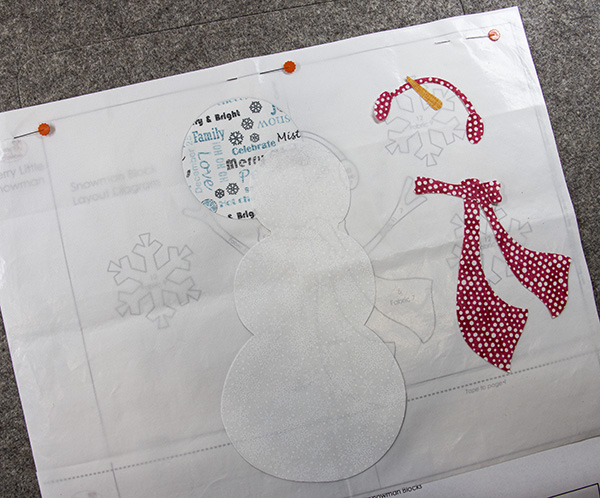
… the arms…
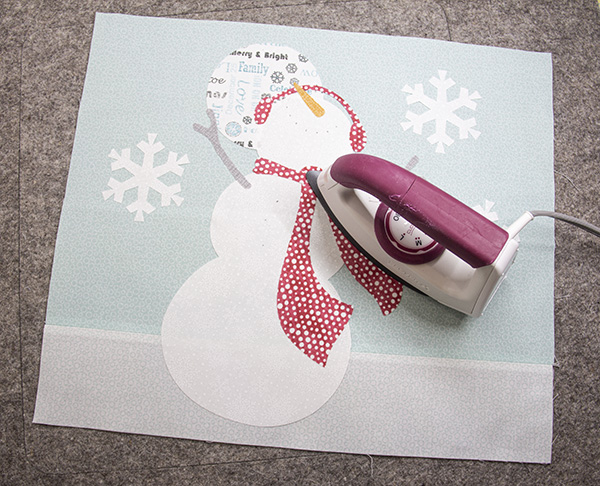
… and finish with the preassembled ear muffs and scarf units.
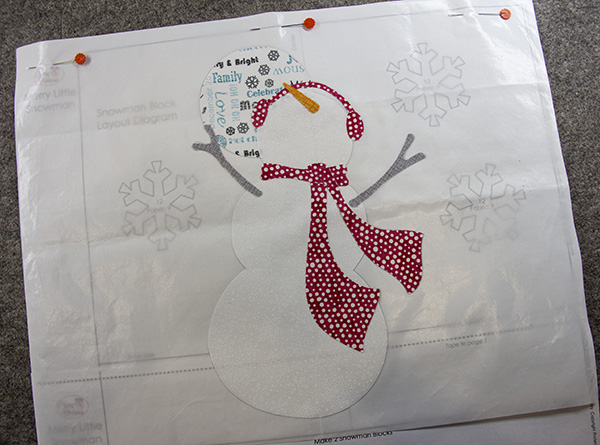
Allow the preassembled snowman to cool off, then peel it off the pressing sheet.
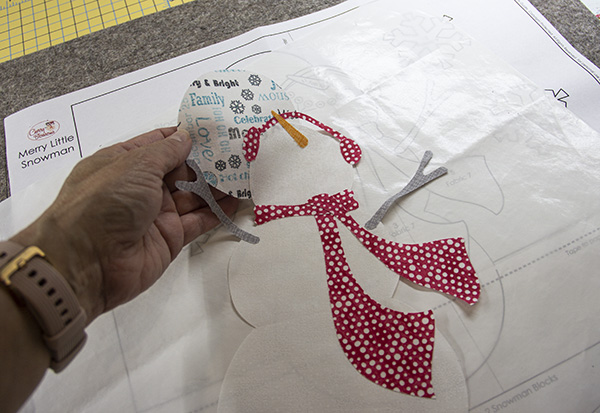
Take the layout diagram to a light source…
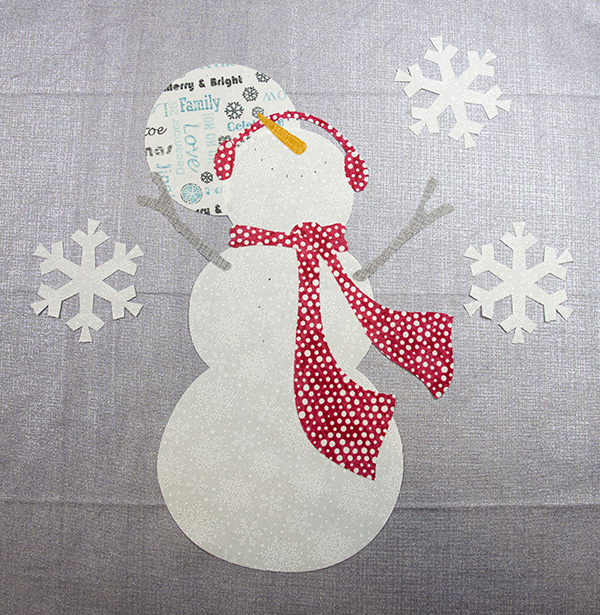
… place the preassembled snowman over it and mark little dots where the buttons will go once the runner is quilted.
Now we get to audition different backgrounds. Have you ever bought the “perfect” background fabric only to find out it didn’t exactly give you the finish you were hoping for?
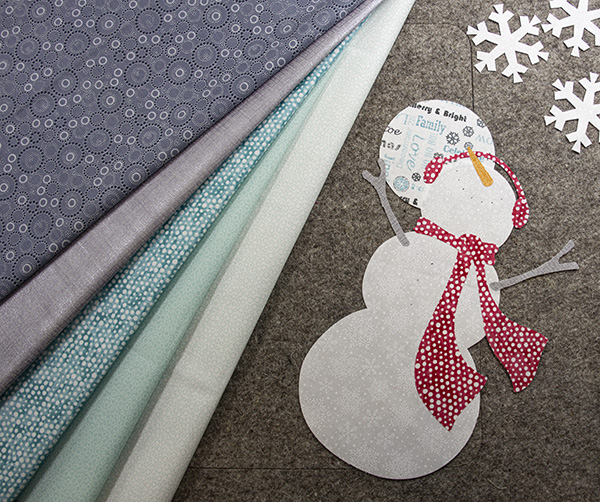
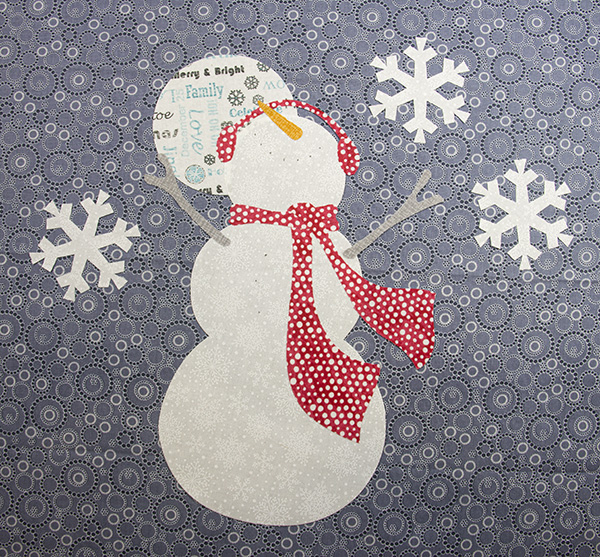
Which background would you use? Perhaps a night sky?
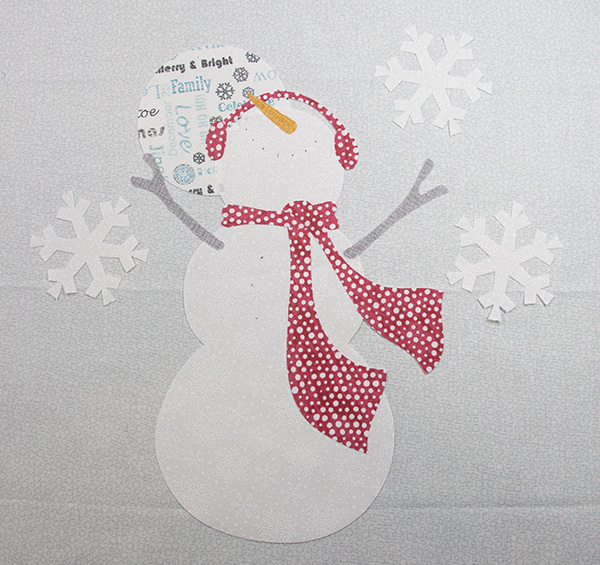
A pretty aqua…
A pearlescent grey…
I know, white would make a great snow day background, right?
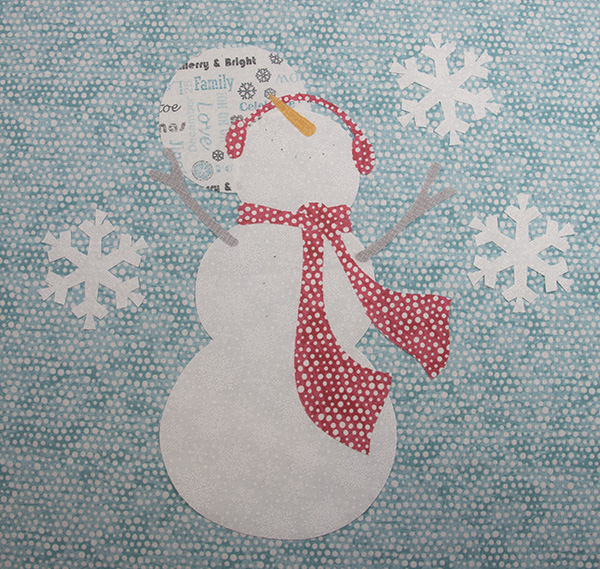
Or how about this soft aqua?
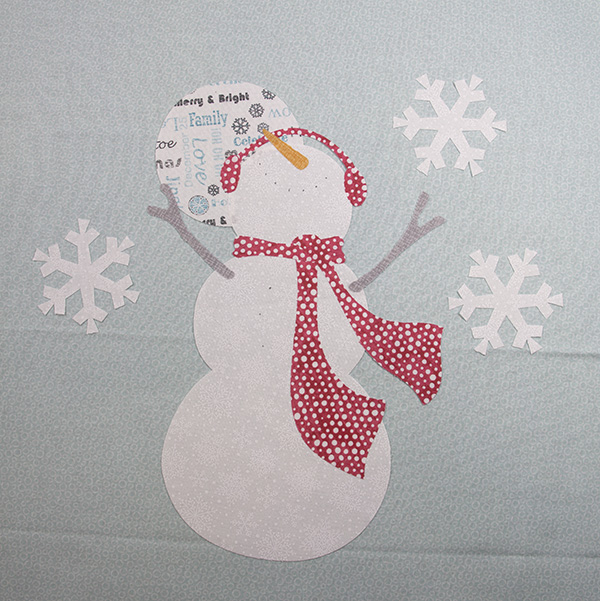
Which one would you choose?
For this runner, I pieced the light aqua and white print for the background. Next step is to pin the background onto the layout diagram, place it over a light source and align the pre-assembled appliques with the diagram.
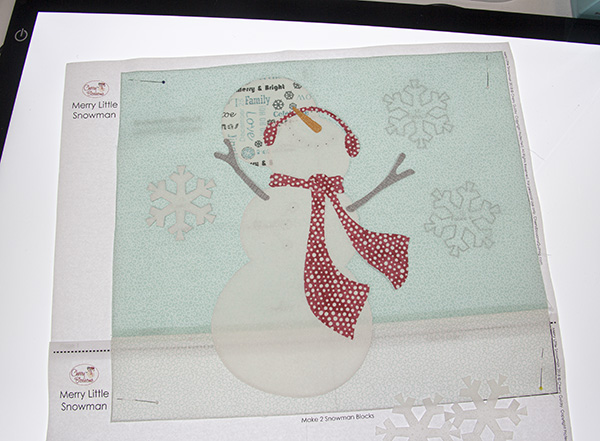
Carefully, take it to the ironing station and do a quick tack’down with the iron…

Remove the layout diagram and fuse the appliques down. Now you’re ready for stitching!
I’m so glad you came for a visit!
Would you like to win a Merry Little Snowman pattern and fat quarter bundle?
Please follow the rest of the 2019 Back To School Blog Hop! Note that these industry peeps are all over the country and world, so be patient if you don’t see their post first thing in *your* morning!
Day 1 – September 1 – Sam Hunter: Sewing Long Seams Without Stretching – huntersdesignstudio.com <<—- you are here!
Day 2 – September 2 – Susan Arnold – Joining Binding the Easy Way – quiltfabrication.com
Day 3 – September 3 – Angie Wilson – Fussy cutting tips and techniques – www.gnomeangel.com
Day 4 – September 4 – Andi Stanfield – No-Mark HST: Let your machine be your guide – truebluequilts.com/blog/
Day 5 – September 5 – Bobbie Gentili – Say YES to Y-seams – geekybobbin.com
Day 6 – September 6 – Mel Beach – 5 Reasons to Say Woo Hoo! to School Glue – pieceloveandhappiness.blogspot.com
Day 7 – September 7 – Laura Piland – 7 Ways to Use a Laser on Your Sewing Machine – www.sliceofpiquilts.com
Day 8 – September 8 – Suzy Webster – How to solve loops in free motion quilting – www.websterquilt.com
Day 9 – September 9 – Tara Miller – Accurate Stitch-and-Flip Corners – quiltdistrict.com
Day 10 – September 10 – Latifah Saafir – Accurate Seams Using Masking Tape! – latifahsaafirstudios.com
Day 11 – September 11 – Sarah Ruiz – The Magic of Glue Basting – saroy.net
Day 12 – September 12 – Jen Shaffer – Ways to stop your ruler from slipping while cutting – patternsbyjen.blogspot.com
Day 13 – September 13 – Cheryl Sleboda – Basics of ruching (a vintage fabric manipulation technique) – muppin.com
Day 14 – September 14 – Raylee Bielenberg – Choosing quilting designs for your quilt – www.sunflowerstitcheries.com
Day 15 – September 15 – Jen Strauser – Accurate and Attractive Machine binding – dizzyquilter.com
Day 16 – September 16 – Jane Davidson – Matching points for all types of intersections – quiltjane.com
Day 17 – September 17 – Teresa Coates – Starch and starch alternatives – teresacoates.com
Day 18 – September 18 – Jen Frost – Benefits of spray basting – faithandfabricdesign.com
Day 19 – September 19 – Sandra Starley – Getting started with Hand Quilting – utahquiltappraiser.blogspot.com
Day 20 – September 20 – Karen Platt – Drunkard’s Path Made Easy – karenplatt.co.uk/blog/
Day 21 – September 21 – Kris Driessen – All Kinds of Square (in a Square) – scrapdash.com
Day 22 – September 22 – Sarah Goer – Planned Improv Piecing – sarahgoerquilts.com
Day 23 – September 23 – Kathy Bruckman – Organizing kits for on-the-go sewing – kathyskwiltsandmore.blogspot.com
Day 24 – September 24 – Cheryl Daines Brown – The Secret to Flat Quilt Tops: Borders – quilterchic.com
Day 25 – September 25 – Cherry Guidry – Pre-assembling fusible applique – cherryblossomsquilting.com
Day 26 – September 26 – Laura Chaney – Getting started with English Paper Piecing – prairiesewnstudios.com
Day 27 – September 27 – Ebony Love – Cutting Bias Strips from a Rectangle – lovebugstudios.com
Day 28 – September 28 – Tammy Silvers – Working with heavier weight threads in your machine – tamarinis.typepad.com
Day 29 – September 29 – Kathy Nutley – Create a perfect facing or frame with 90 degree angles – quiltingsbykathy.com
Day 30 – September 3 – Joanne Harris – Using Leaders and Enders – quiltsbyjoanne.blogspot.com
This is adorable! Thank you for the great tips!
I love the snowman block and all the different backgrounds you used to show it!
This was really helpful–and your block is darling. Thanks for the tutorial, and the giveaway.
I use what is called baking paper and once the whole applique is done,lift it off and fuse to the fabric.your photos are a great way to show the way to do this.
You have inspired me to get back into applique. I like the step by step tutorial. Very helpful.
This is a great tutorial! Thank you. Do you have any recommendations for inexpensive light sources?
What a cute snowman block. I like the background blue you used.
Love snowmen for winter.
That is so sweet. You always do such a beautiful job on your appliqué.
Thanks so much for this! I’ve owned an applique pressing sheet for years but never really knew how to use it. This was so helpful!
What a fun Snowman block!!! LOVE it!
I love the way you made your snowman. It looks very pretty on all the backgrounds.
Thank you for the chance at your giveaway.
Love your snowman block. Great pictorial tutorial.
Love this cute snowman!
Love the snowman block. Thanks for the tutorial and giveaway.
I love your snowman. Thank-you for the tutorial and all the tips. I need that iron.
You’ve answered so many questions I’ve had rolling around in my head about fusible applique…thank you! duchick at gmail dot com
Fusible applique is the only way I applique!! Great tips, especially for those fiddly little pieces that easily get off just a bit and can change the whole look of the piece! Thank you!!
Thank you for the awesome tips! I love your snowman. Thanks!
Wonderful snowman, great tips!
Thanks for the tutorial. I have a pressing sheet and have been nervous about trying it. You made it easy. And cute cute snowman!!
Very Helpful. Thank you for sharing your knowledge with us. I am in to win that sweet bundle. Thanks again.
Oh m y goodness, this is adorable. Thank you for the generous give a way. I am teaching myself applique now. And I LOVE snowmen, so I think this is a match made in snow.
Great tutorial. And the block is adorable.
Great job I I’ve this idea ty for sharing this fun snow man…
Love the Snowman!! & thank you for chance to win your give-a-way!! My BFF collects snowmen…this would sure make a “one of a kind” from me to her! 🙂
I love the snowman. Great Tutorial
Your demonstration of how to best use the pressing sheet was very helpful!
Thanks for the pressing tips! This method of using the pressing sheet makes applique so much more accurate!
Love this pattern. Snowmen are my favorite!!!
“Merry Little Snowman” is adorable. The fabrics are beautiful.
This is so cute! I love applique!
Loooove the Snowman!! Thank you for chance to win your give-a-way!
Great motivation to get started on holiday projects when the project is so cute!
this is so sweet. i think i would love to make place mats for this Christmas
Lovin chances to win this adorable snowman bundle!! 🙂